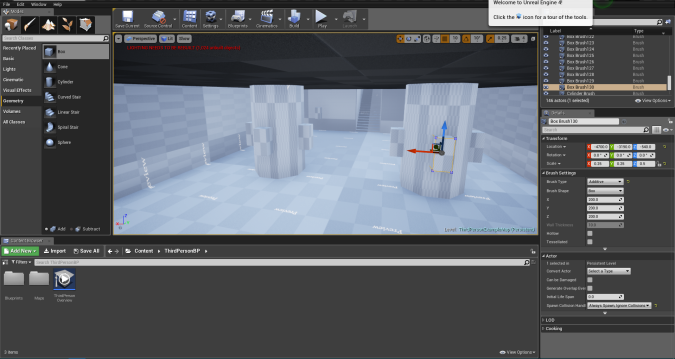
Blockout
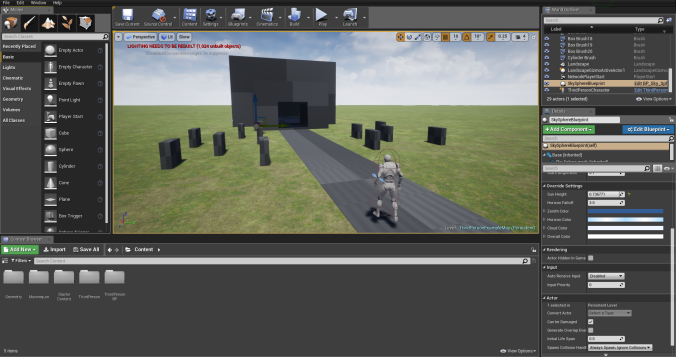
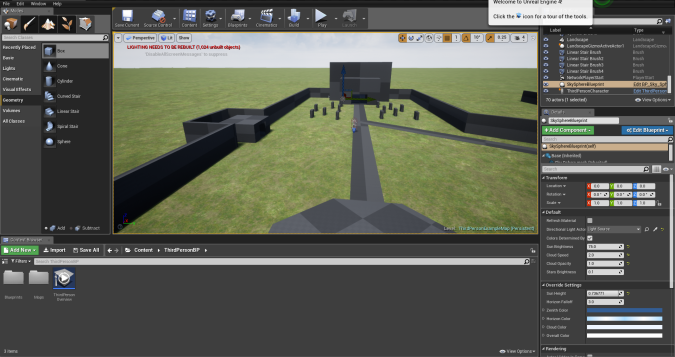
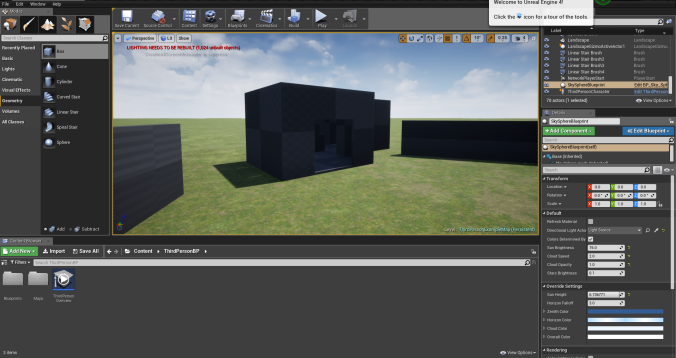
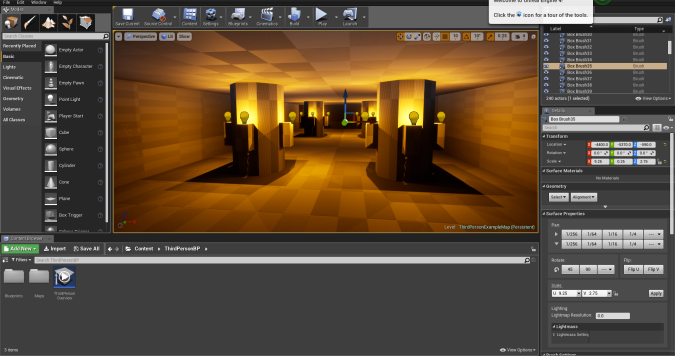
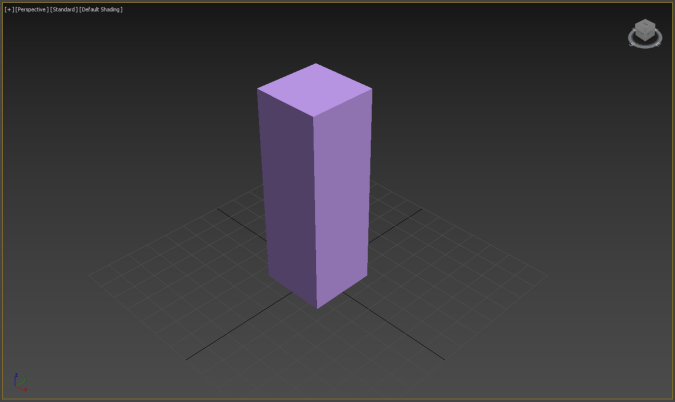
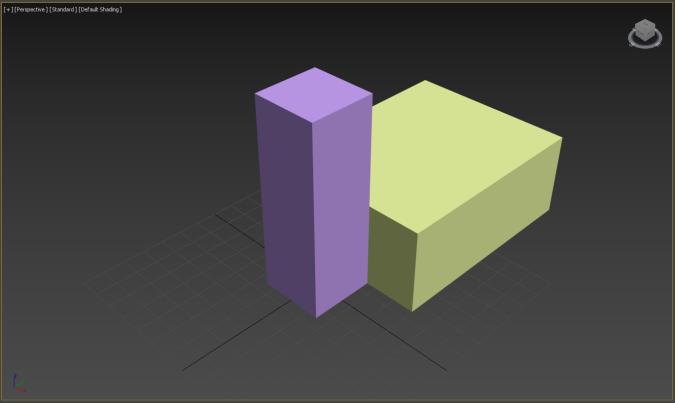
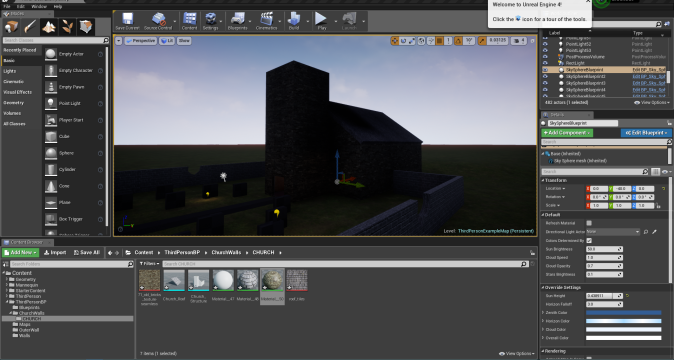
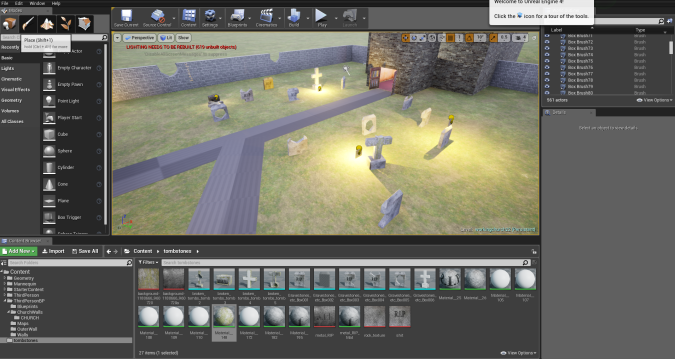
Before actually adding detail to the environment/level, I was tasked with blocking out my level design in Unreal Engine. I started the blockout by creating a blank plane which set out the landscape for the blockout. I then applied a grass texture to the blank plain, showing that it is the floor. I then used a geometry block and stretched it out to represent the path model. I also created a blockout of a simple church, that the player could go inside and explore. Blocks half the size of the normal geometry block were placed around to represent tomb stones.
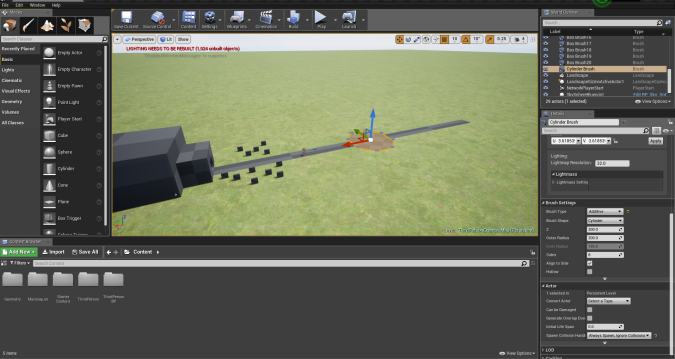
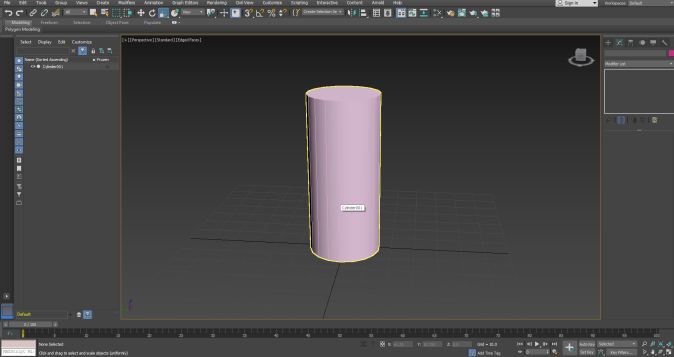
After that, I added a geometry cylinder in just after where the path ended. The cylinder is supposed to be the middle of the path/level design. Right after the cylinder, I copied and pasted the same path after it, leading to the end of the level blockout.
Right after finishing that, I decided to work on the blockout for the catacomb area of my level design, which was quite a challenge to accomplish. I had to edit the visibility of the ground through the script blueprints, allowing me to create a hole in the ground of the grass landscape. Creating a hole in the landscape, allowed me to add steps letting the player go beneath the landscape on the blockout. After doing that, I created an exterior around the hole and the stairs, covering up the hole so the player can’t see it whilst exploring the environment/level.
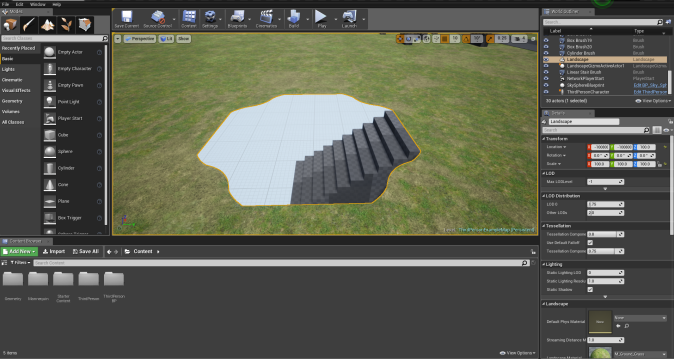
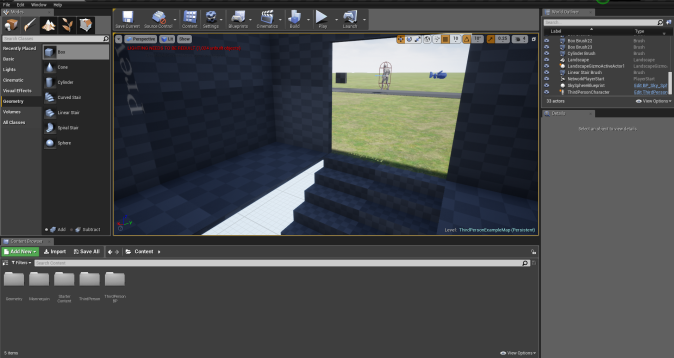
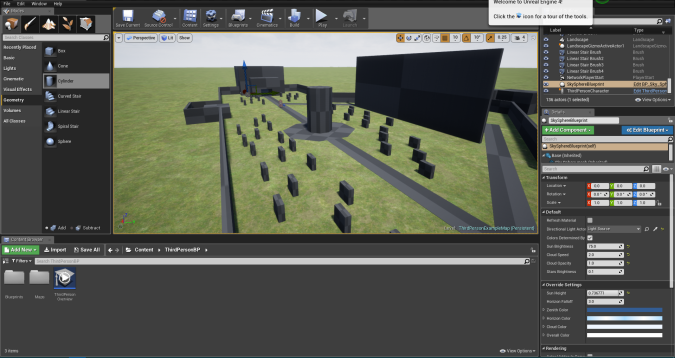
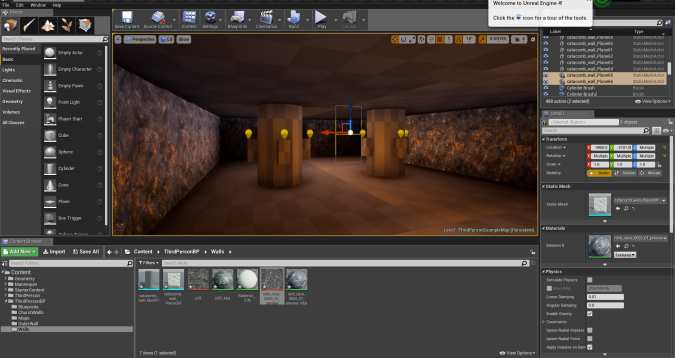
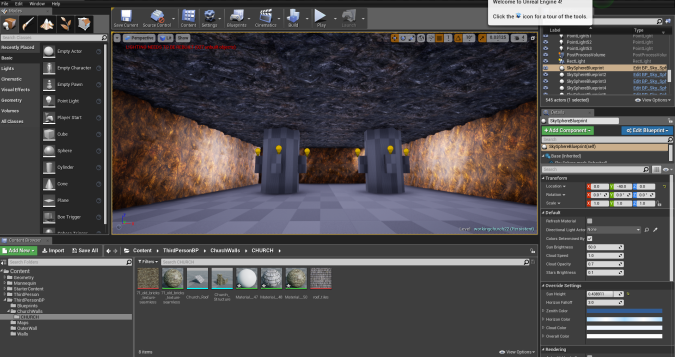
The next important thing to do for the blockout, was adding walls around the steps leading down to the catacombs beneath the blockout environment/level. Doing this made it so the player couldn’t see out underneath the level. Doing this allowed me to make the catacomb blockout itself. I closed off the blockout area of the catacomb, making it so the player can’t see outside of it. I also added cylinders in the centre of the catacomb, which represent blockouts for the pillar asset I plan on making.
Once the catacomb blockout had been completed, I moved back above the landscape and focused on blocking out the boundaries for the player, not allowing them to explore outside the area I created in the blockout. Doing this allowed me to add another section of the blockout, which is two branching angled paths leading to a shed at the top of the level/environment. I added an extra room to the shed blockout because in my level design sketch, I specify that there will be a secret room in the shed. I then covered up the secret room exterior with the boundary wall.
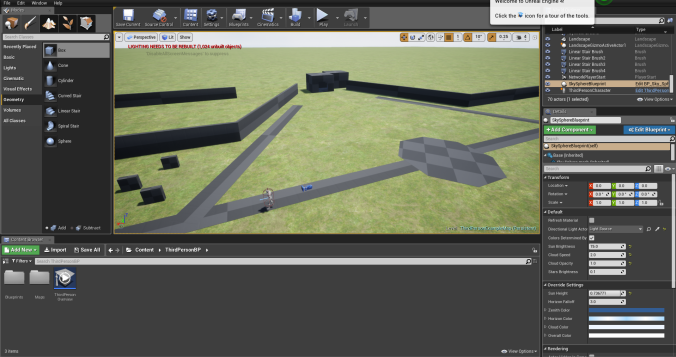
I then added a cylinder object extruding from cylinder path in the middle of the area, as it is supposed to be the blockout for the statue model/asset I plan on making for the finished version. Adding the cylinder, reminded me that I needed to block out the torches around the pillars in the catacomb area. Which is what I did right after adding a blockout for the statue.
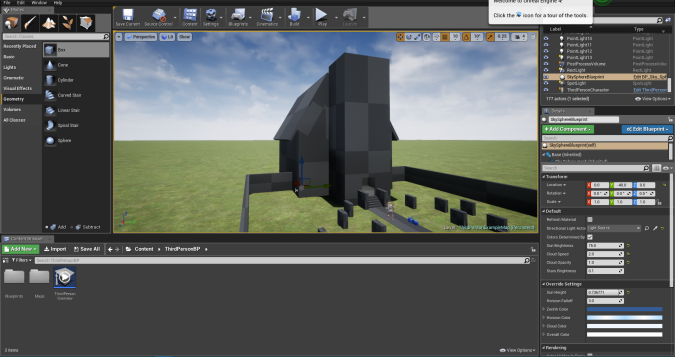
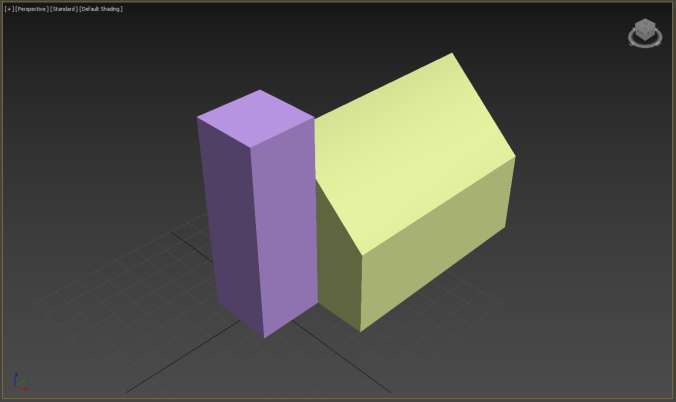
I finished off the blockout by adding more detail to the church blockout, showing that it is actually a church, rather than just two blocks put together. I added a stair case to the entrance of the church, giving it more detail. Not only this but, I added a roof to the church to show that the blockout is supposed to represent an actual building.
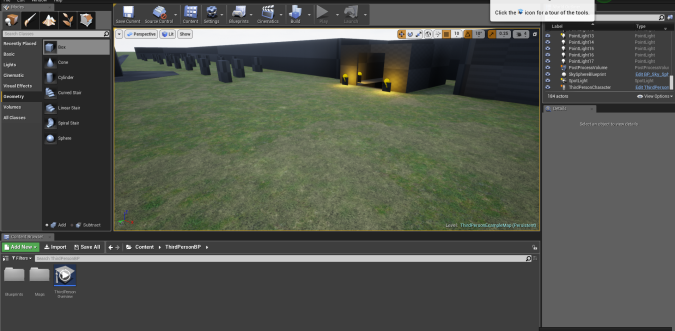
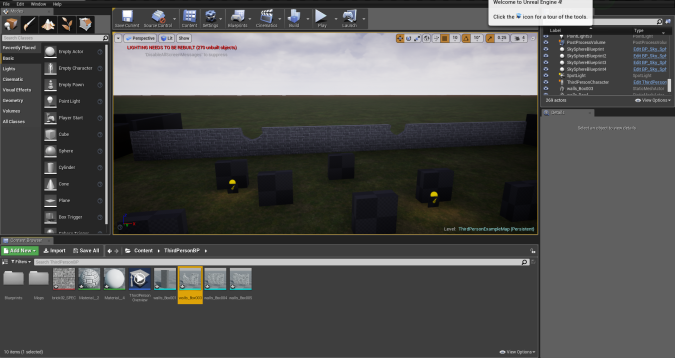
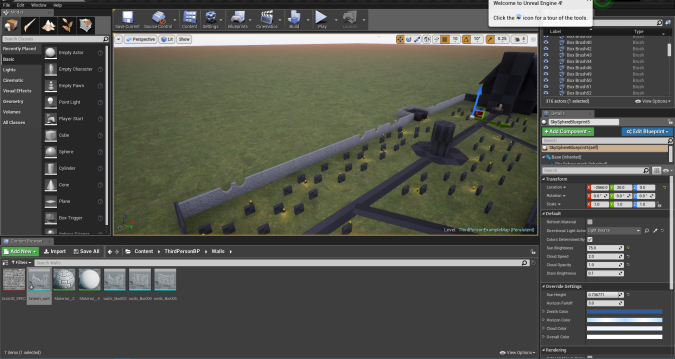
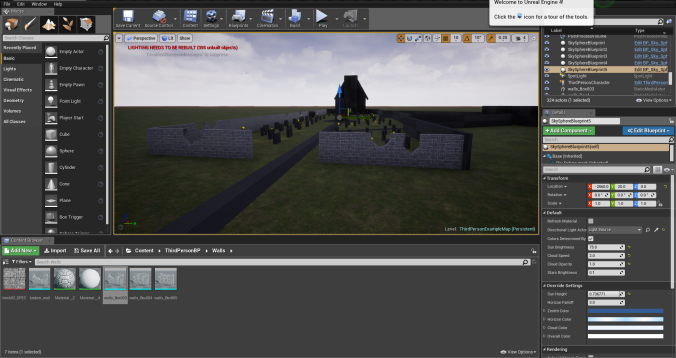
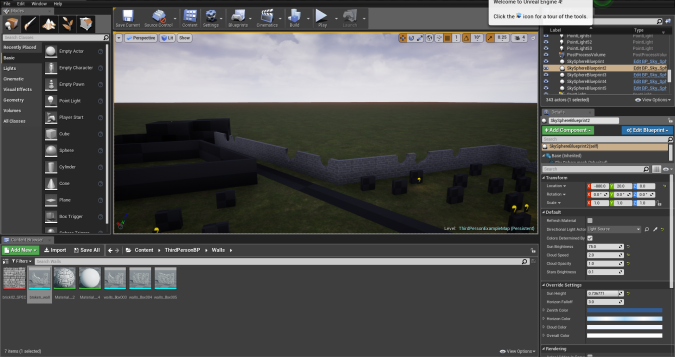
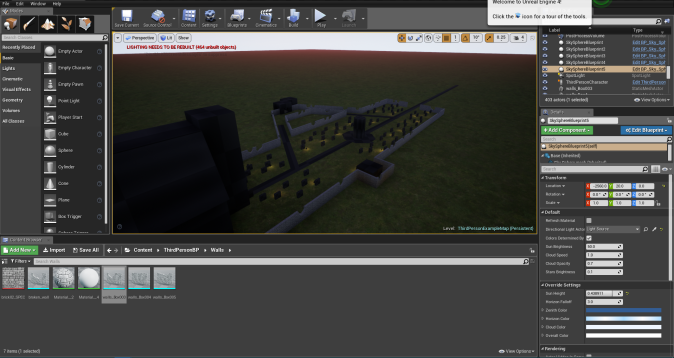
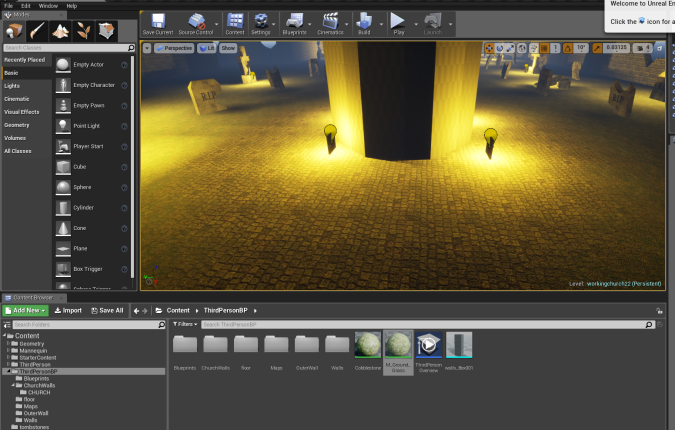
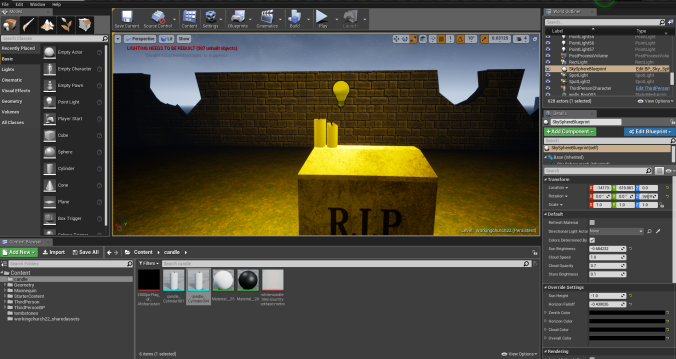
The final thing to do was add lighting to the blockout, as I had finished adding the blocks building the level up and leaving it in a playable state. Actually this isn’t fully true, as I created thing blocks which represented candles and I placed an orange/yellow point light on the top of the block to show that it is supposed to be emitting light. I put this on a few gravestones. I also did this for the torch blocks on the pillars in the catacombs. Not only did I do this but I also extended the size of the catacomb block out, as I had received criticism claiming that the catacomb area was too small. I finished this all off by lowering the brightness in general, giving it a more gloomy atmosphere.
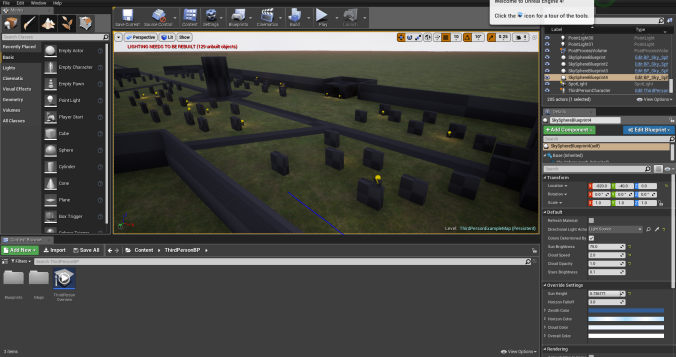
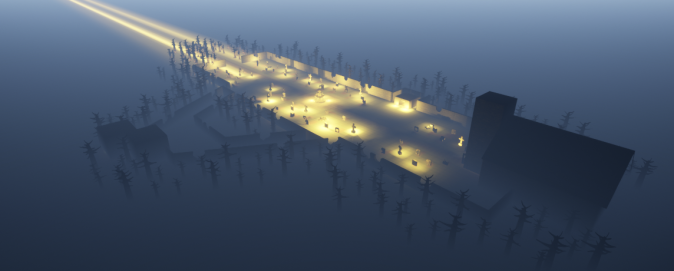
VIEW FROM THE TOP:
Project
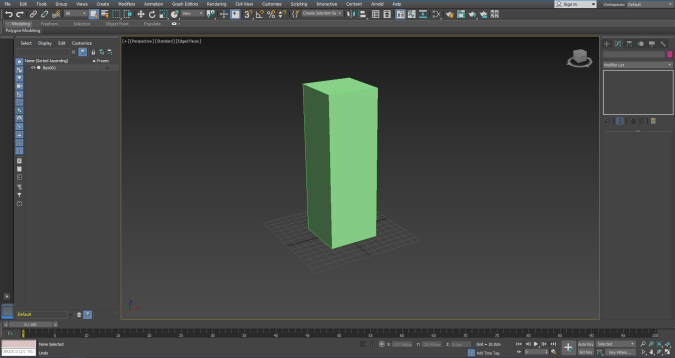
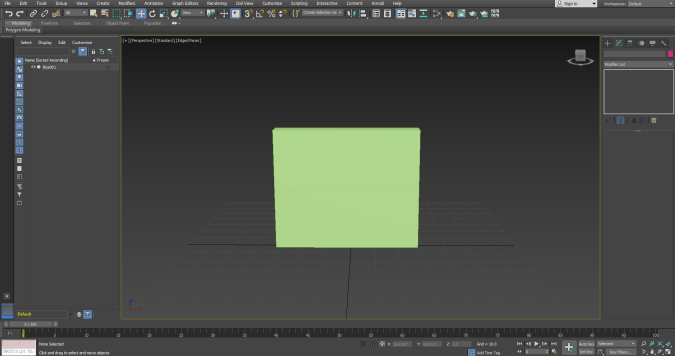
I began this practical work by creating the modular 3D models before I worked on the intricate assets. I started creating the outer walls for my project, by creating a model which is supposed to represent the player model in unreal engine. I made sure the make the model the same proportion as the player model in unreal, which helped me not make the model too big or too small for the player. (I also made sure to set the measurements to the same as the unreal engine measurements).

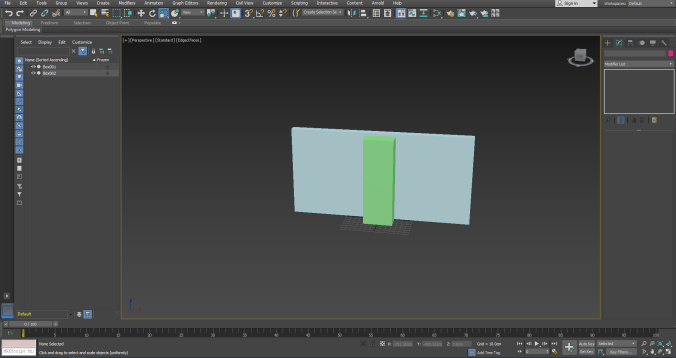
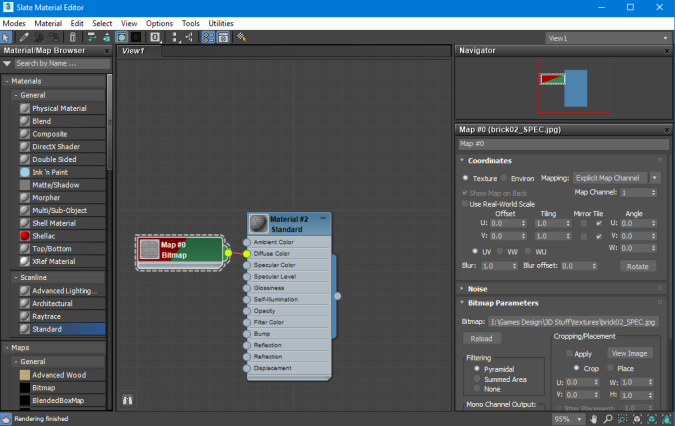
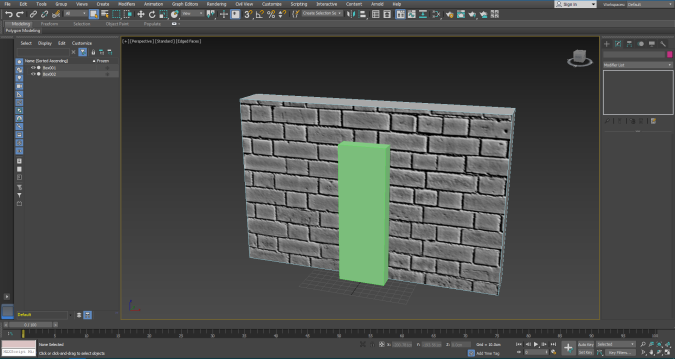
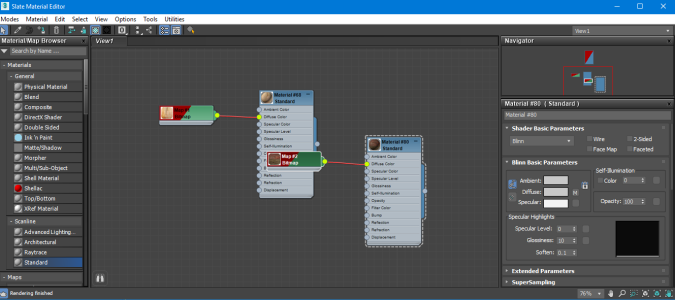
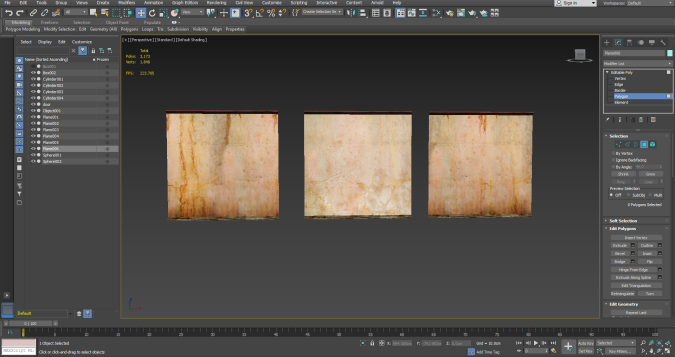
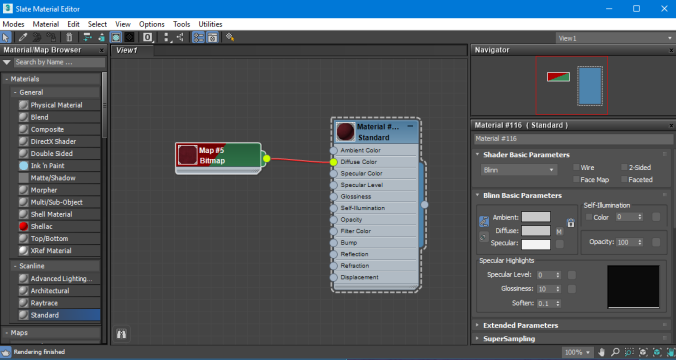
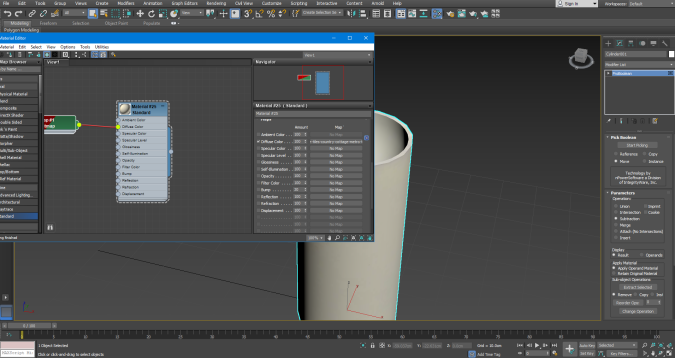
After measuring how big the wall will be, using the player model place-holder as a guide, I then added a texture to the wall by highlighting the object and entering the material editor section in the top right area in 3Ds Max. I then dragged in a “Standard” scan-line into the material editor, and I added a bitmap to it. I set the bitmap to a repeating cobblestone texture, which I thought would work for the outer walls of my environment.
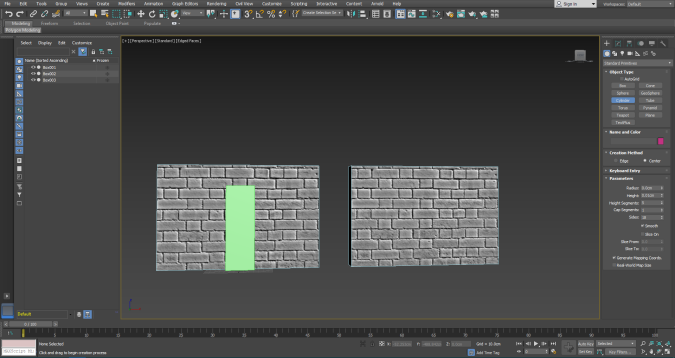
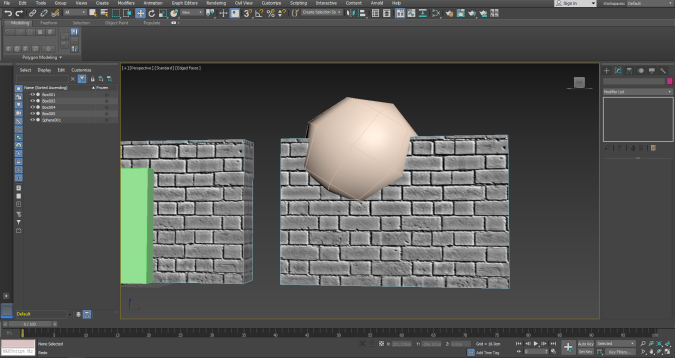
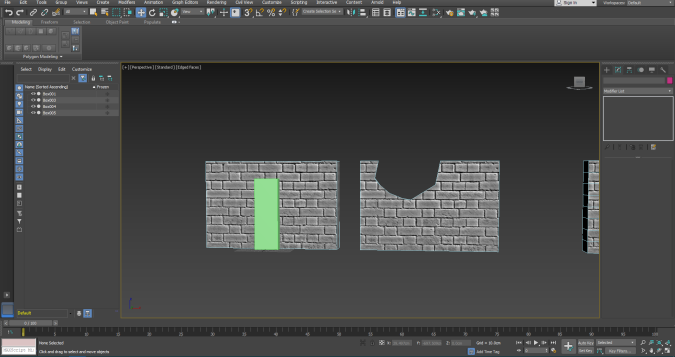
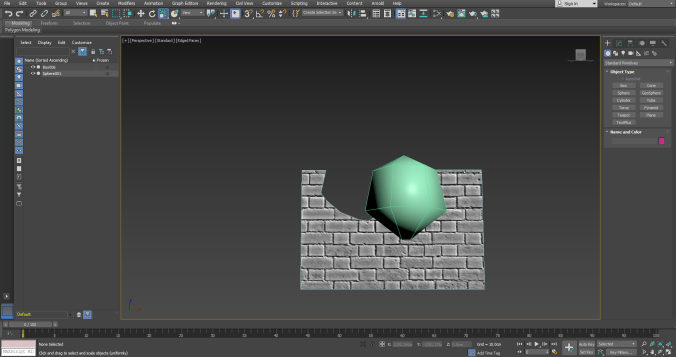
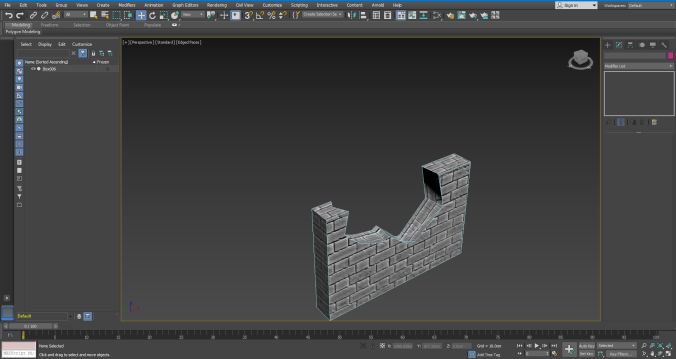
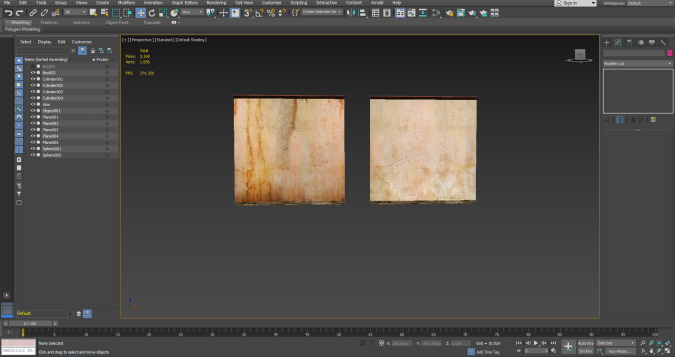
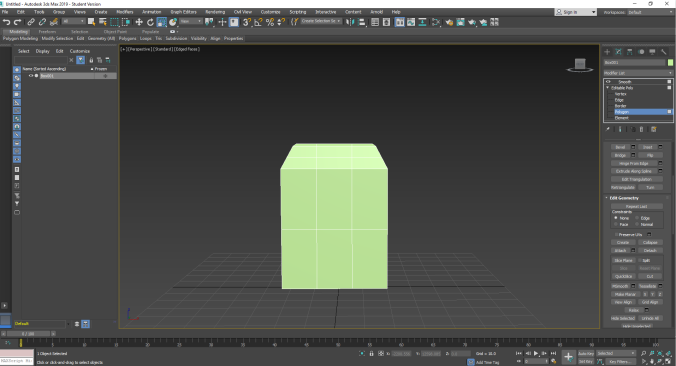
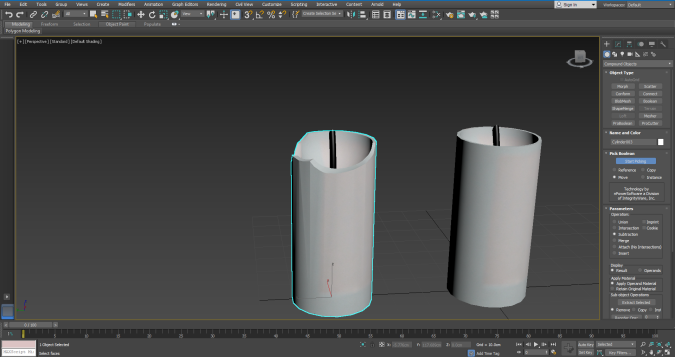
Since I wanted to add some variation to the wall model, instead of having one design I decided to make 2 different types of wrecked walls. (This is also because I want my graveyard environment to look somewhat abandoned). I started working on this by adding a sphere with a low amount of polygons to the top/inside the wall. I then used the proboolean tool on the sphere and the wall, doing this deleted the section of the wall the sphere was inside, giving it a destroyed look. I then added more spheres to create a different variation to the wrecked wall.
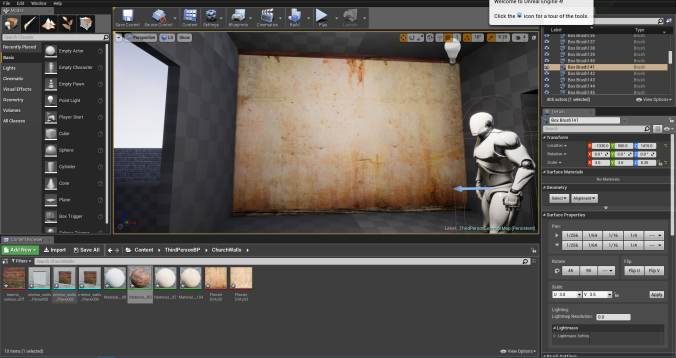
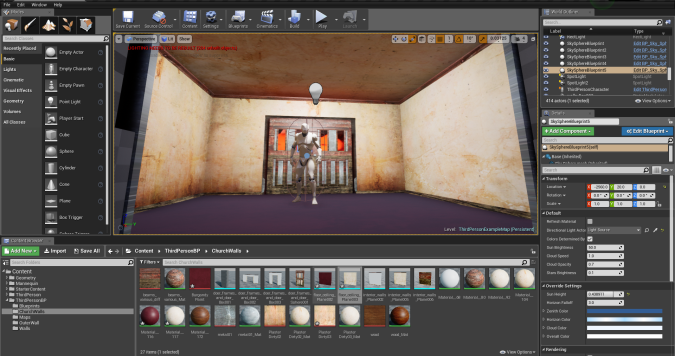
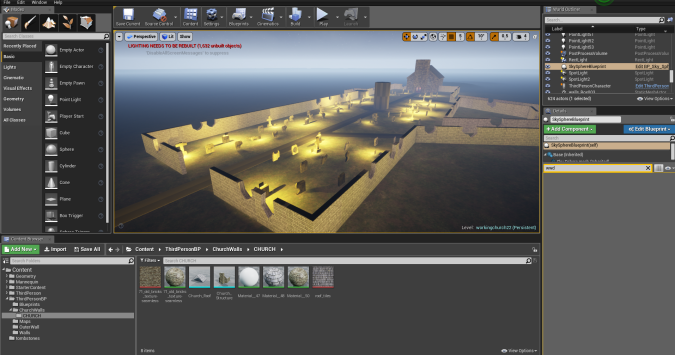
I then finished off this wall model by adding it into my Unreal project. I replaced the blockout of the outside wall with the wall model I had created in the 3Ds Max.
After completing the outside wall model, I then moved onto the interior wall of my church. Unfortunately, I do not have multiple screenshots of me creating the interior wall model, as we were being taught how to create them during a lesson. (This is also the case for the door model I created later). For this wall, I made it an editable poly, which allowed me to select certain sections of the wall to texture, which is helpful due to the fact I wanted to have 2 different textures on the wall. After I had selected a certain polygon of wall and went into the material editor and followed the same process as I did when I made the outside wall for my project.
After I had created the walls, I placed them into my Unreal project in the inside of the church blockout.
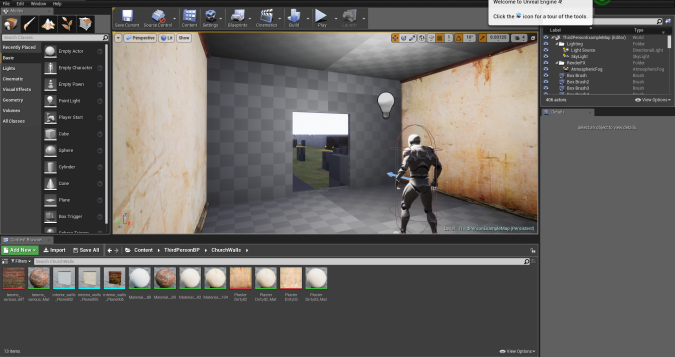
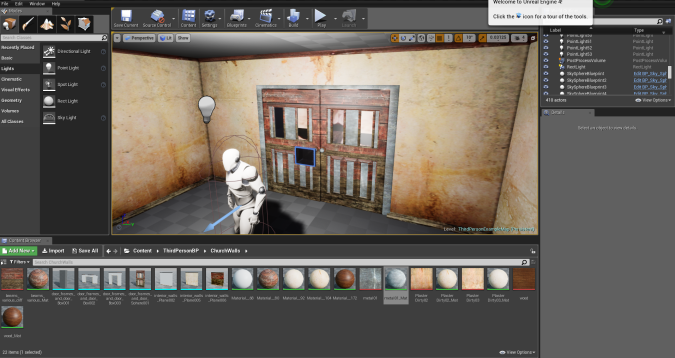
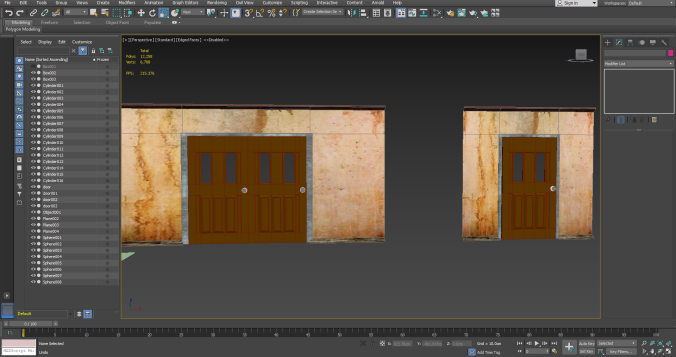
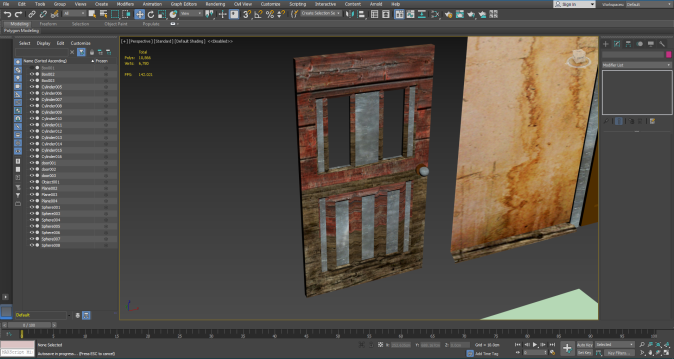
After creating the simple wall modular model. I worked on the doorway version of the modular wall. Unfortunately, I also created this model during a lesson on learning how to create it, so I did not take screenshots showing the process of creating it. I placed it into my Unreal project, and added the doors I had created in the doorway gap, blocking the player from entering the inside of the church (I wasn’t planning on doing anything for the inside of the church). Whilst creating the doorway, I created a door at the same time which allowed me to measure the size of the doorway and helped me understand how big the door should be for the doorway.
For the floor and ceiling modular models of the inside area of the church, I followed the same process I did when making the walls and doorway of the church. I just added a plane to 3Ds MAX and added a texture to it through the material editor in the top bar of 3Ds MAX. I followed the same steps that I usually did when applying a texture to a model, I dragged in a standard scanline. Selected a bitmap map and chose the texture I wanted to use for the model. I finished them off by adding them to my Unreal project.

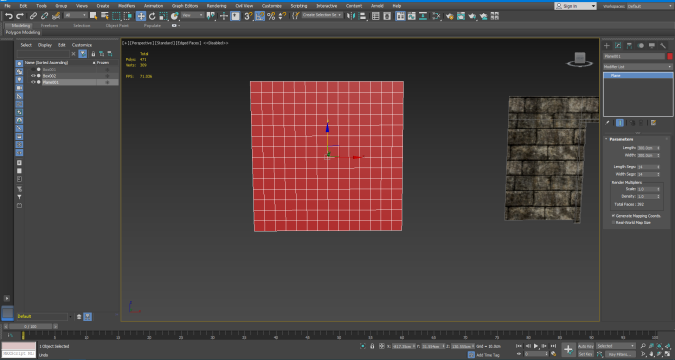
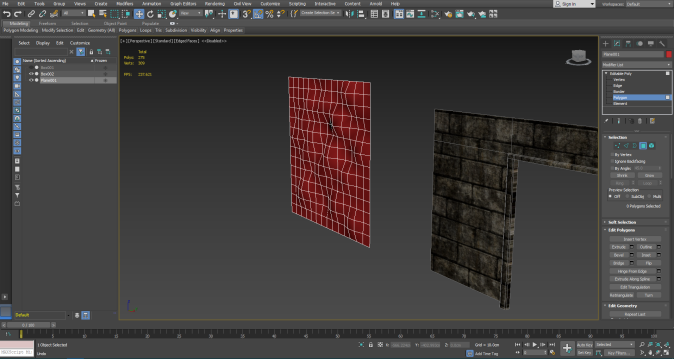
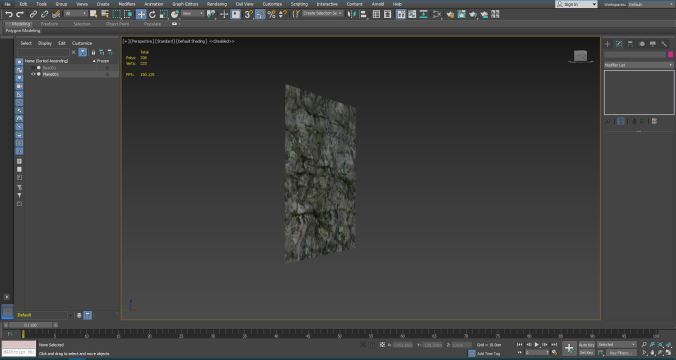
The final area that uses modular models is the catacomb area in my unreal environment. I started creating the modular walls for the catacomb in by placing a plane model in 3Ds max. I increased the line segments for the plane model. After doing this, I turned the plane into an editable poly and selected the vertexes of the object. I dragged out certain parts of the vertexes, giving the plane a bumpy/uneven look making it look like rocks are sticking out of it from a side view. I finished it off by going into the material editor, adding a rock texture to the plane making it look like a rocky wall. I finally put it into my Unreal project, around the walls of the catacomb.
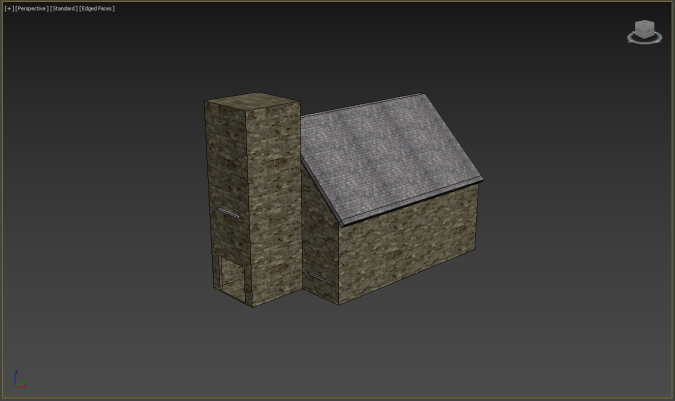
I attempted to add modular walls to the exterior of my church however, that did not work out as well as I had planned so I decided to recreate the entire church in 3Ds MAX. I started out creating 3Ds MAX by adding a rectangle model in the centre. I then added a bigger cube behind the model. I then changed the back cube into an editable poly allowing me to select the edges and connected them, creating an edge in the middle of the model. I selected the edge in the middle and lifted it upwards, creating a triangular shape (which is supposed to be the roof of the church).
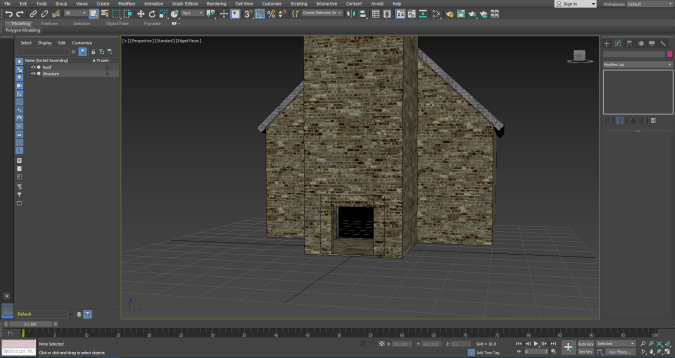
My next priority was to create an area where the player could actually enter the church. I started working on the entrance by creating a smaller cube model, and put it at the bottom of the church. I then used the ProBoolean tool to create a hole in the church (a doorway). I finished off this model by texturing the church. After texturing all the parts of the church, I thought the texture I was using for the roof didn’t work too well so I ended up changing it. I finished it off by putting the church into my Unreal engine environment.

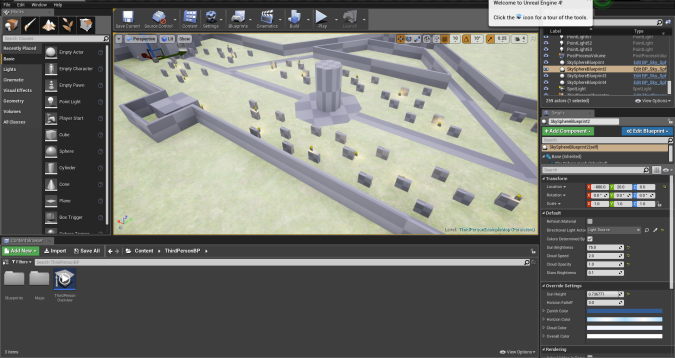
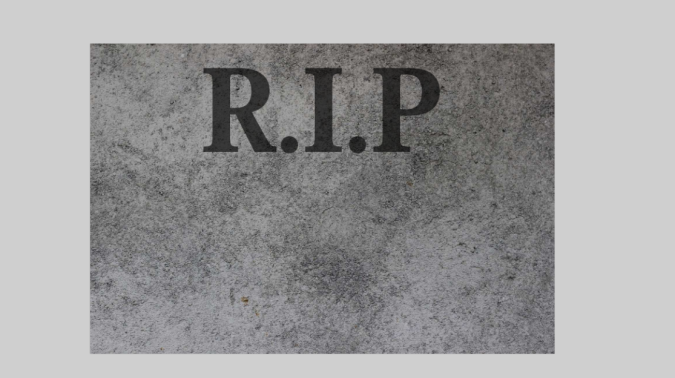
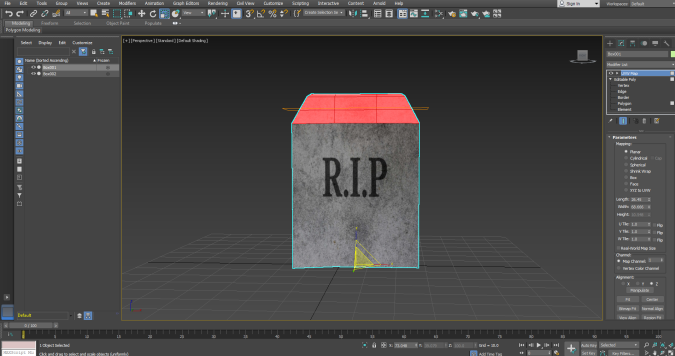
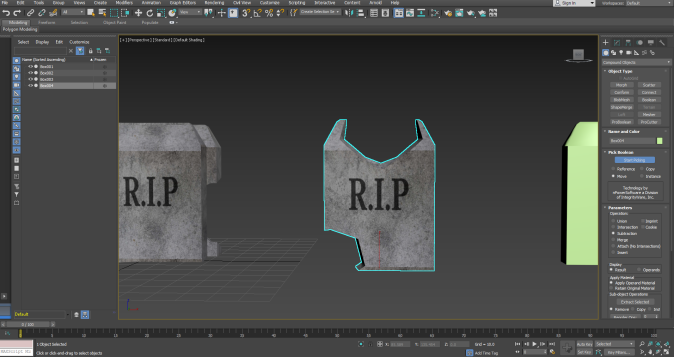
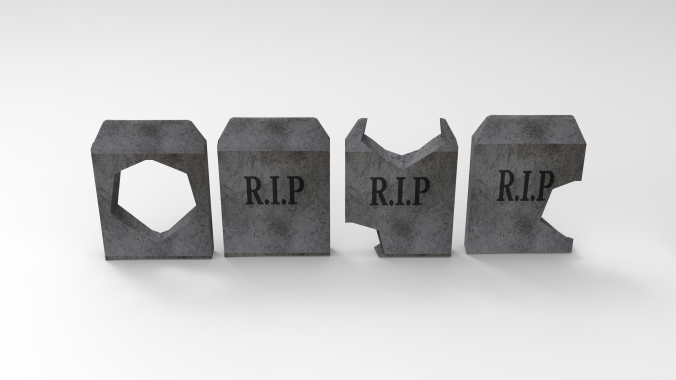
Now that I had finished the more important/modular models, my next priority was to work on the smaller assets. I started this by creating the gravestones for my environment (since it’s a graveyard). I began this process by adding a simple cube into 3Ds MAX. I then turned it into an editable poly and beveled the top, to the point where the top of the cube was somewhat curved.
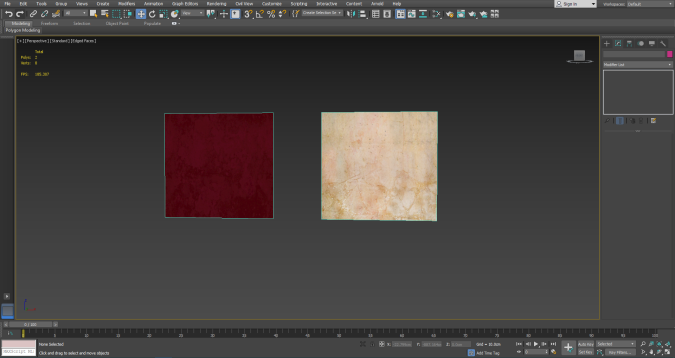
That was the base for the gravestone created, what I wanted to do next was create a texture for it. (I did not unwrap the texture for this model, as it was really simplistic and didn’t need to be unwrapped). I started by getting a stone texture from the internet and putting it into Photoshop. I then wrote over it on a new layer spelling out “R.I.P” in a olden/classic font. I lowered the opacity of the text giving it more of an engraved look. I finished this by applying the texture to my model. (I used the blank stone texture for the other parts of the gravestone).
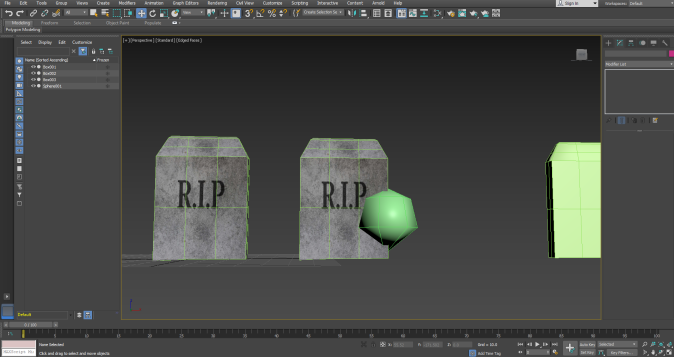
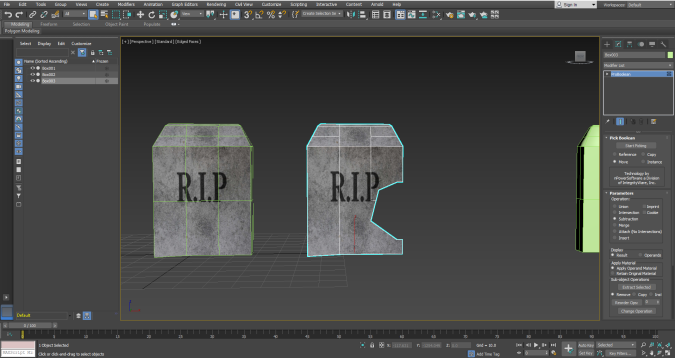
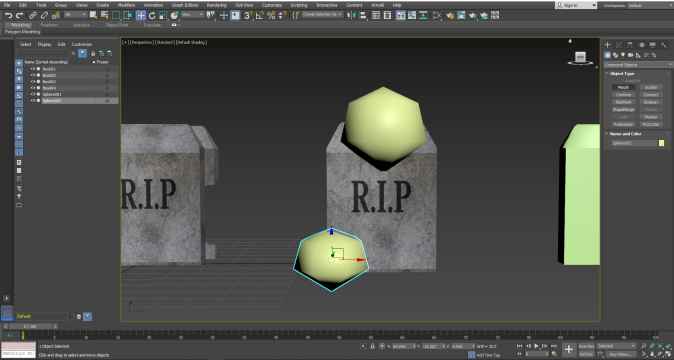
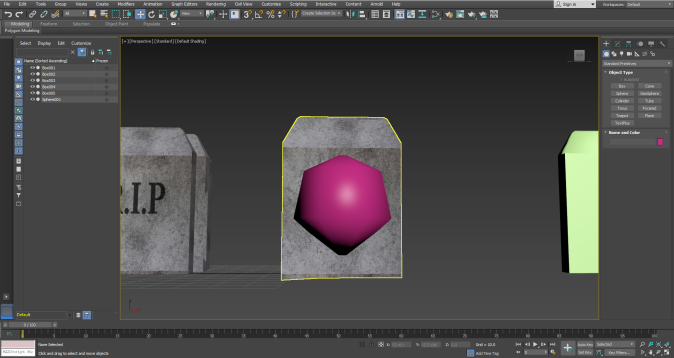
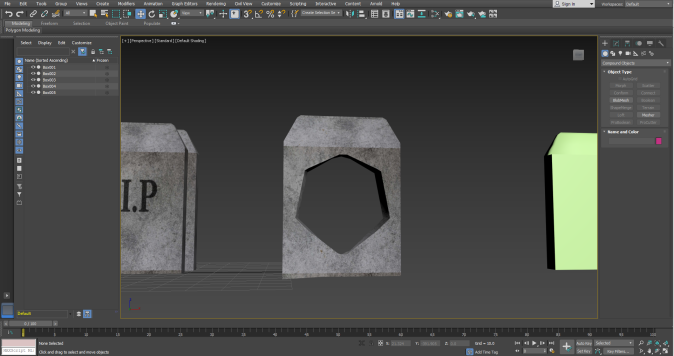
Now that I had created a base gravestone for my Unreal environment, I thought that creating some different variations of the model would give my project look more interesting. I started creating different variations by copying the gravestone over to a different area in 3Ds Max. I then inserted a sphere and lowered the segments of it, making it more jagged. Doing this allowed me to place it inside the gravestone and proboolean it, making it look like the gravestone had been damaged. I did this multiple times.
Final Render:
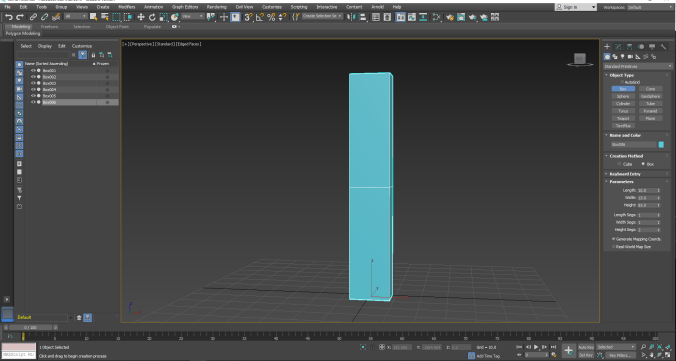
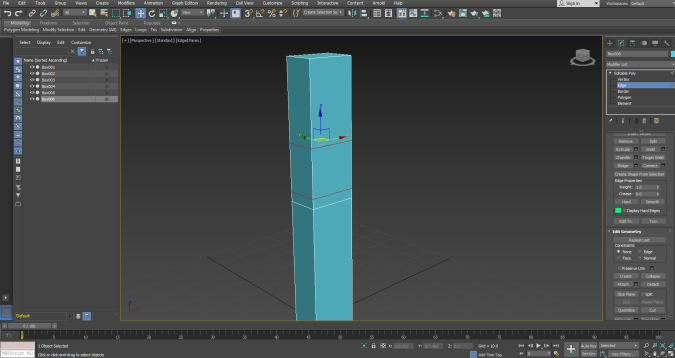
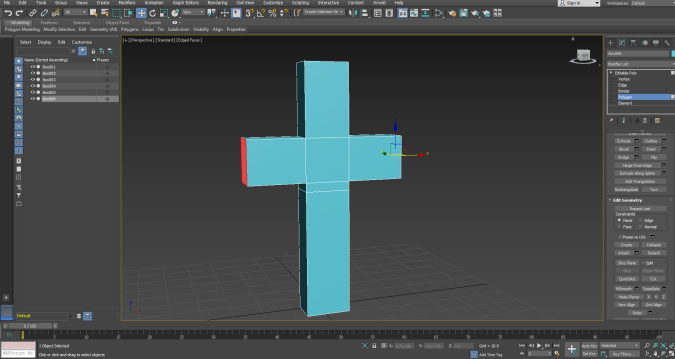
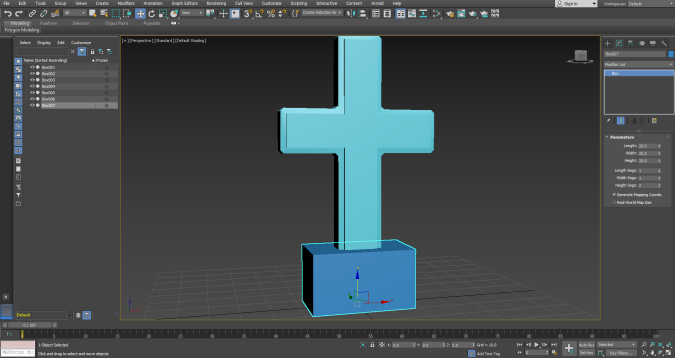
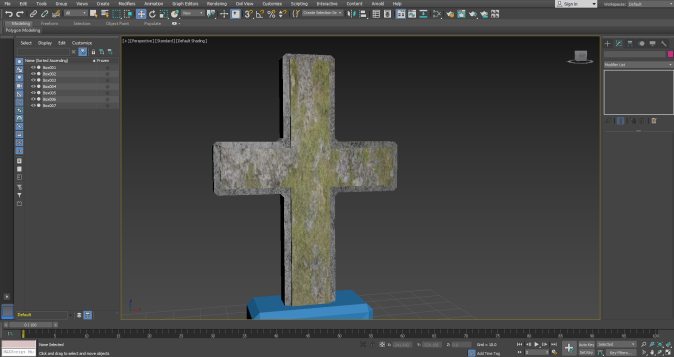
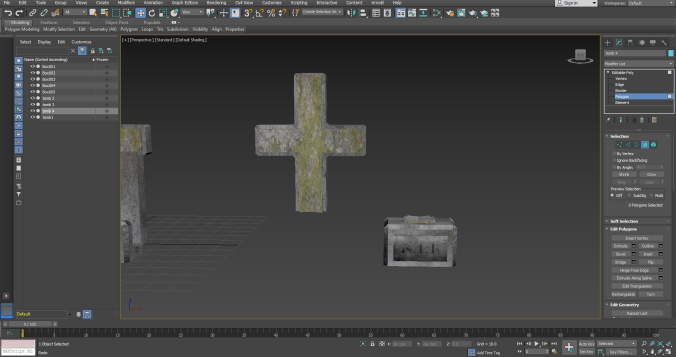
The next model I was planning on making after the gravestones were the tombstones. I started creating the tombstone by adding a cube and extending the height of it. I then turned the model into an editable poly and selected the edges and pressed connect to create some extra segments on the model. Doing this created another face on the model. I then selected the polygon faces on the newly created face of the model, and I extruded it outwards, making the model look like a cross.
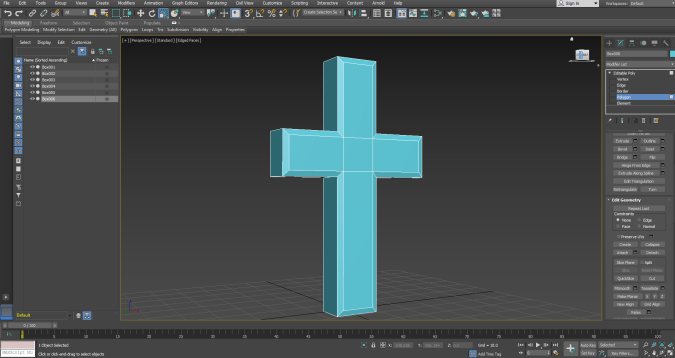
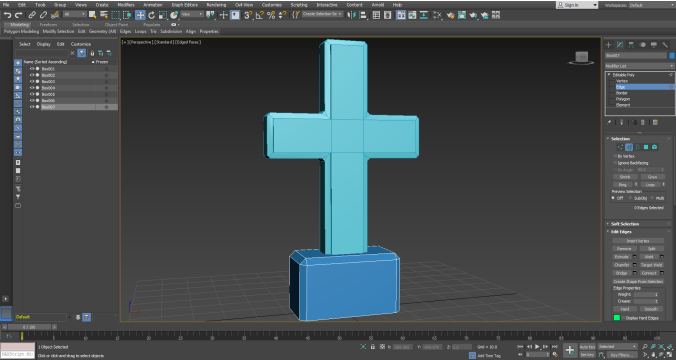
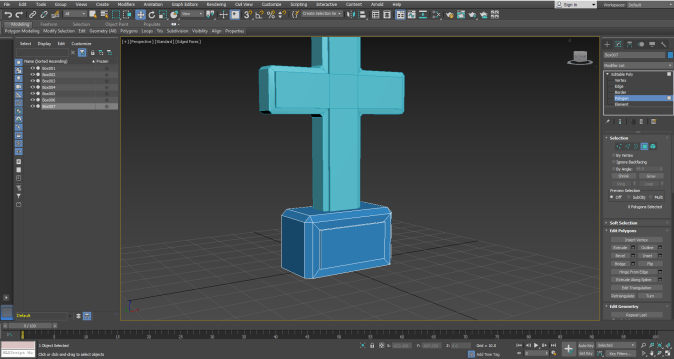
After creating the base model, I selected the edges of my model and chamfered them, giving the centre of the model more of an outline. Doing this allowed me to select the centre of model by pressing polygon and selecting the faces. I then extruded the face on the front and back of the cross making the centre stand out a bit more. (I made sure not to extrude it out too far). I did this because I wanted the centre area of the cross to have a different texture to the outside of it. I thought this would make the model stand out a bit more.
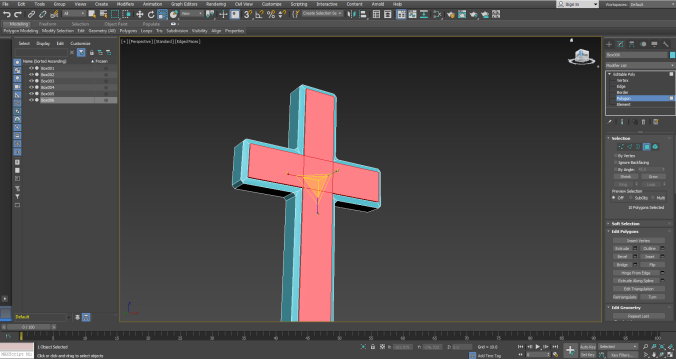
Now that the cross area of the tomb stone had been created, I had to create a base for it as it would look a bit odd by itself. I started the base of the tombstone by adding a cube underneath the cross. I then made it into an editable poly and chamfered all the edges of the cube, making it follow the same theme as the cross model. After completing this, I then selected the centre of the base. I followed the same method as I did when extruding the centre area of the cross. I did this because I wanted the base to have an area with text saying “R.I.P”.
I finished off the tombstone by texturing it. (Again I did not UVM unwrap it whilst texturing it, as the model was quite simple and did not need to be unwrapped when being textured).
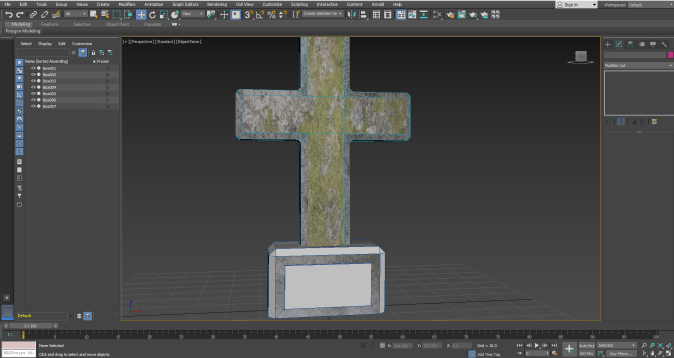
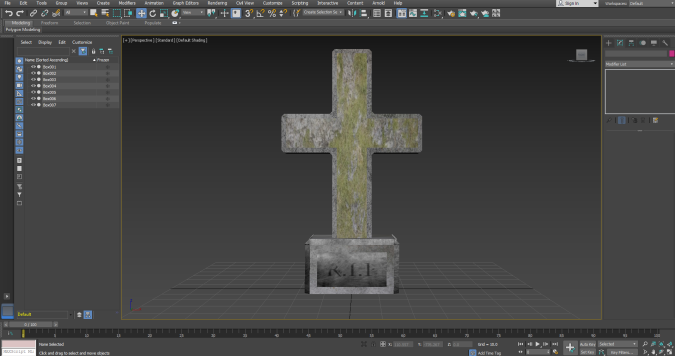
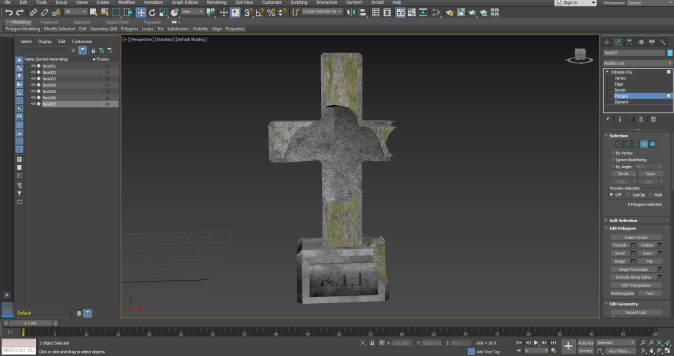
After finishing the tombstone I created some different variations of the tomb stone. I did it the same way as I did for the gravestones. I started this by creating a sphere with a low amount of segments, which makes it more jagged. I placed the sphere in certain sections of the tombstone and probooleaned it from the tombstone, creating holes.
Final Render:


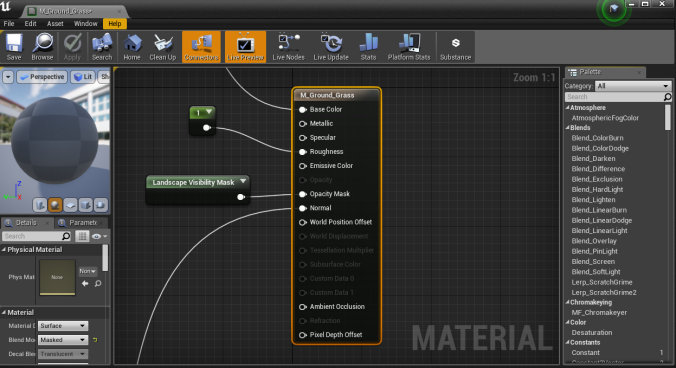
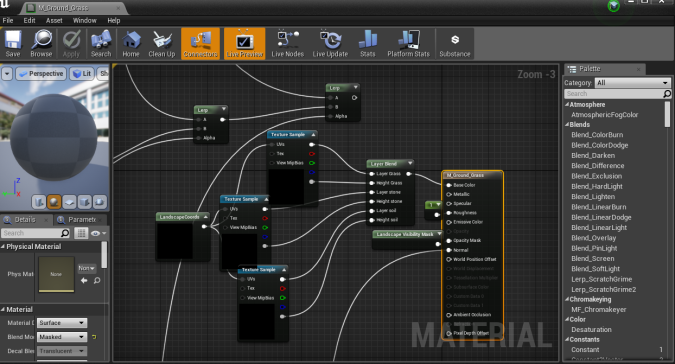
I attempted to create a path in 3Ds Max but it didn’t turn out as well as I hoped. I couldn’t find a good tiling texture for the path and soil of the gravestones. I then had the idea of changing the texture of the terrain to match what object was supposed to go there. I started working on this by going into the blueprint for my grass terrain. I added a Layer Blend and multiple texture samples. These texture samples being the textures I want to use for the terrain. I added the texture samples by dragging and dropping the certain textures into the blueprint, and connect them up to the correct layer blend segment. Once I had done this, I was able to paint on different textures onto the terrain.
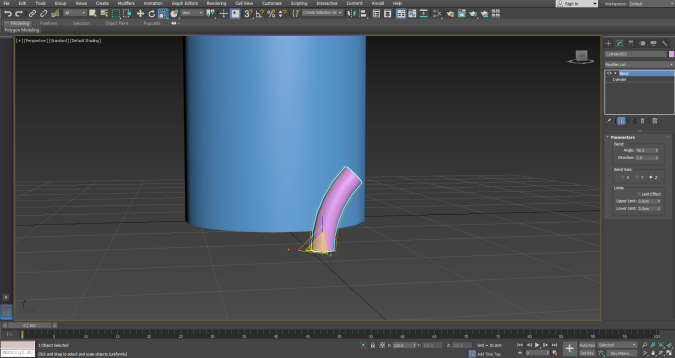
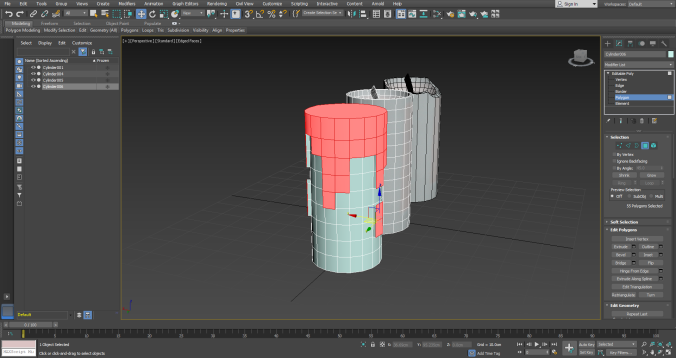
Creating a reason for a light source being by the gravestones was my next priority. I started making a candle model by placing a cylinder down in 3Ds Max. I then placed a sphere on top of the cylinder and did the proboolean method to create a hole on the top of the cylinder. (This was my first idea for a candle, and I wasn’t full confident when it came to making on).
After that, I placed down a smaller cylinder next to the soon to be candle model. I then went into the modifiers and used the bend modifier on the smaller cylinder to angle it slightly. I finally placed it inside the hole of the candle model.
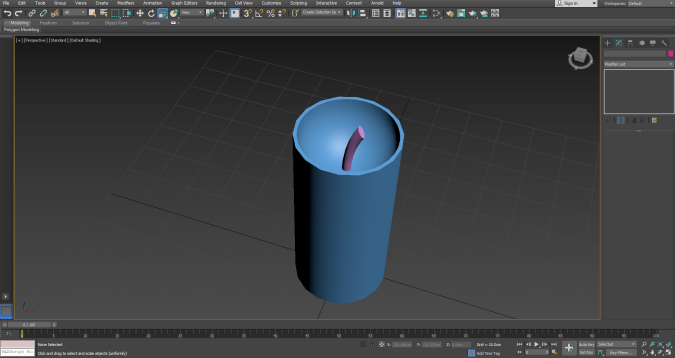
I then attached both of the models together and added textures to the candle model. I textured it by making the cylinder an editable poly, allowing me to select the polygons I wanted to texture. I did this for both the big cylinder and the small cylinder. (I did not unwrap this model, as it is not a complex model).
After texturing the candle, I copied and pasted it over to the side to make a new version of it. I did what I did for the tomb stones and gravestones, and used the proboolean tool to make different variations of the model. (Adding a sphere with low segments into the model and probooleaning it on the model).
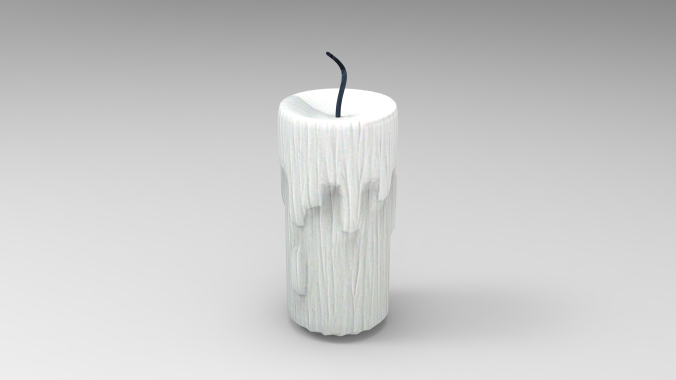
Whilst making the models, I thought of a much better way to make a different version of the candle with more detail on it. I started making this different version by creating a cylinder again however, this time I increased the segments of the cylinder. I did this because after making it an editable poly, I wanted to select polygons around the cylinder and extrude them. After doing that, I then bevelled the top of the cylinder making a more natural hole, rather than just probooleaning it. I then extruded the circular polygon in the centre of the hole, creating the wick of the candle.
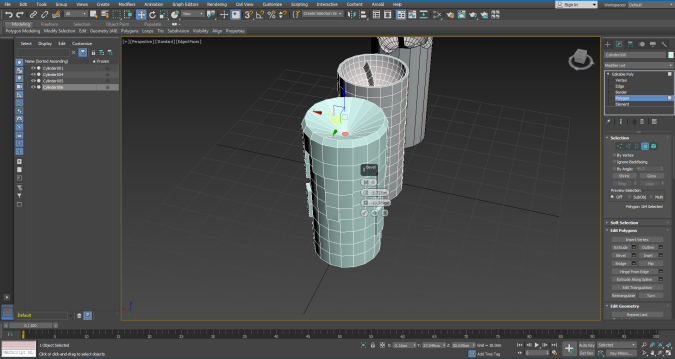

I finished off the candle by turbosmoothing it and texturing it.
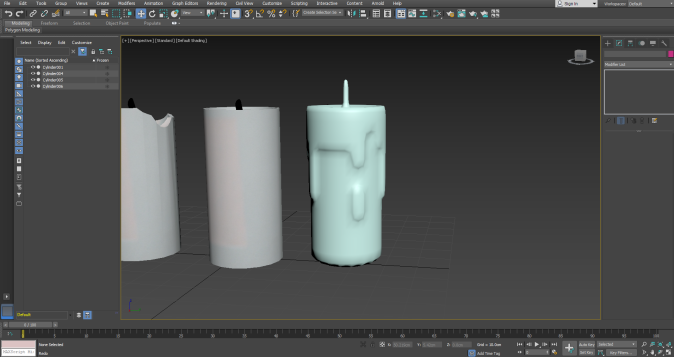
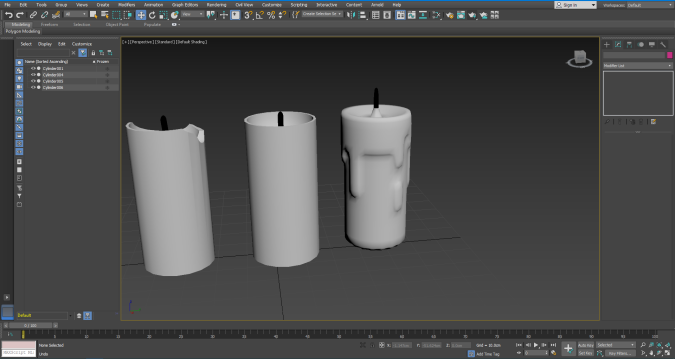
Final Render:
I then implemented the models into my project.
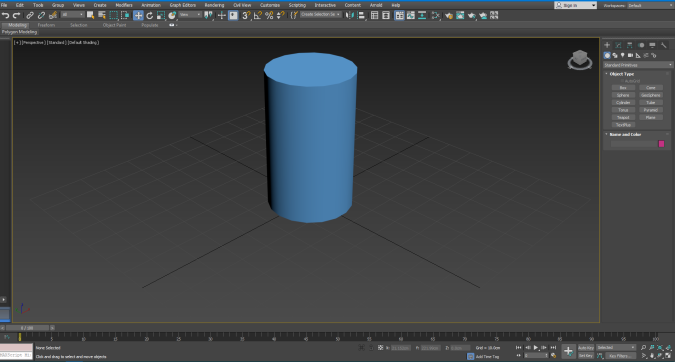
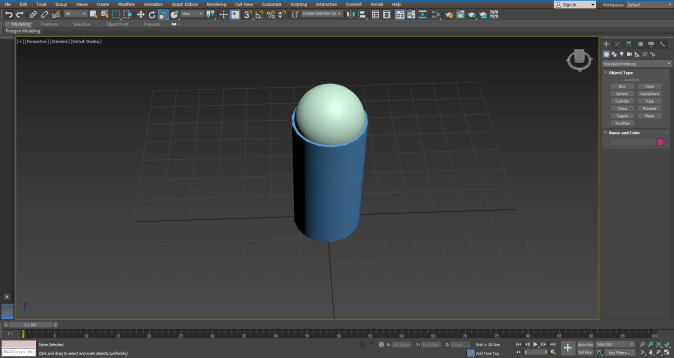
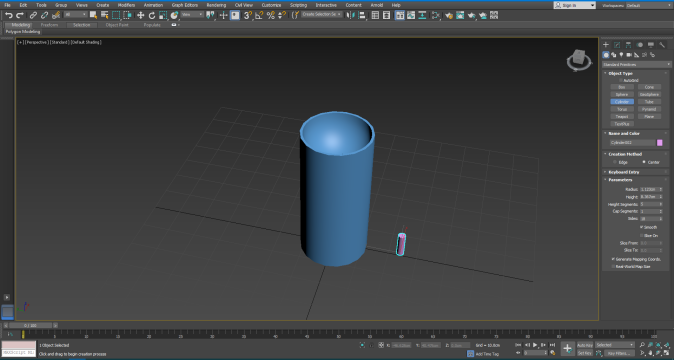
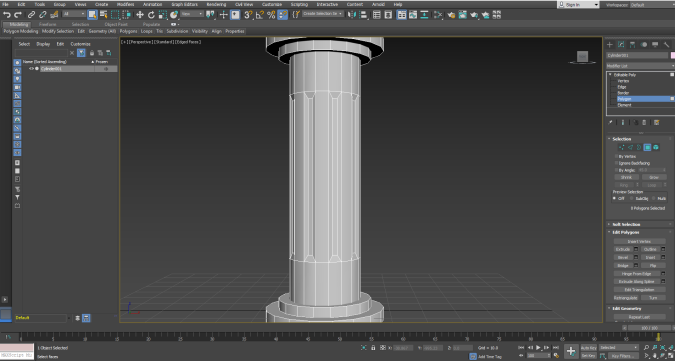
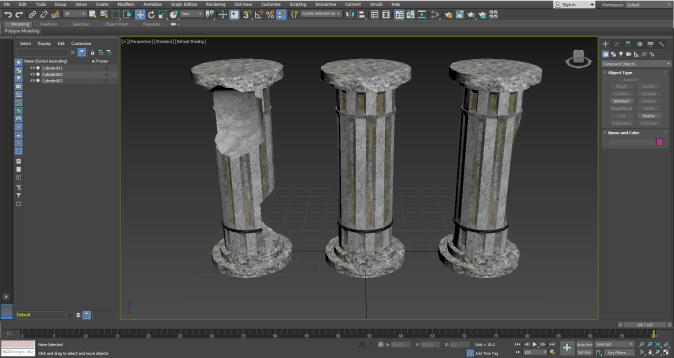
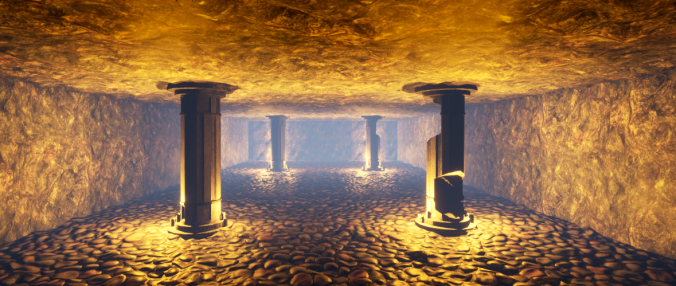
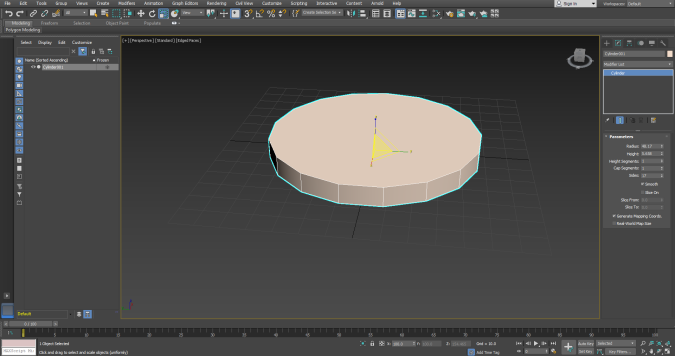
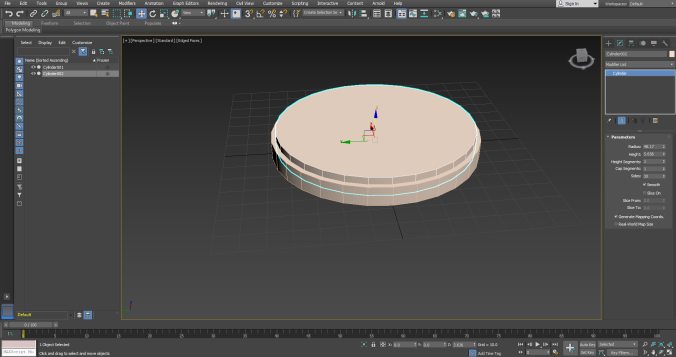
After completing the candle model, my next priority was to focus on the catacomb area of my Unreal environment. I started working on this area by creating a 3D model for a pillar that will be in the catacomb area. I began creating the pillar by implementing a cylinder into the centre of 3Ds MAX. I made sure that it had a decent amount of segments, helping me mess around with it/allows me to edit more polys when I turn it into an editable poly. I then created somewhat flat/bigger cylinders to make he base for the pillar, as I didn’t want it to just be a cylinder with nothing else.
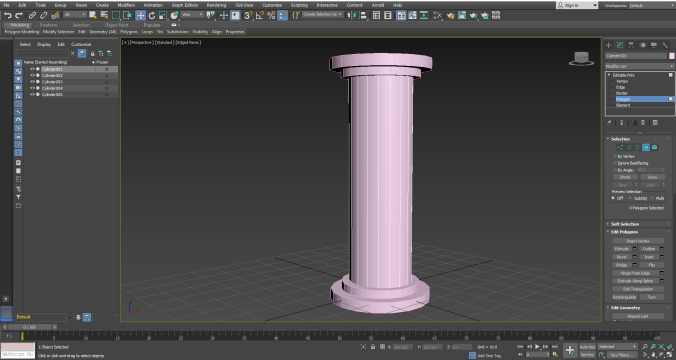
I then turned the centre cylinder into an editable poly. Doing this allowed me to select the all the centre edges. After selecting all of the centre edges, I then used the connect tool giving a line segment above and below the cylinder. On the inside segments of the cylinder, I selected the polys in a pattern and beveled them inwards giving the cylinder of the pillar a pattern. I then thought adding another segment to the top and the bottom of the cylinder would help me make the area blocking off the centre look more appealing. I then selected the polygons inside the centre of the new segments and extruded them outwards. Not only this but, I added a similar pattern to the top area of the cylinder, just in a different order of where they are placed. I finished the cylinder in the centre by texturing it.
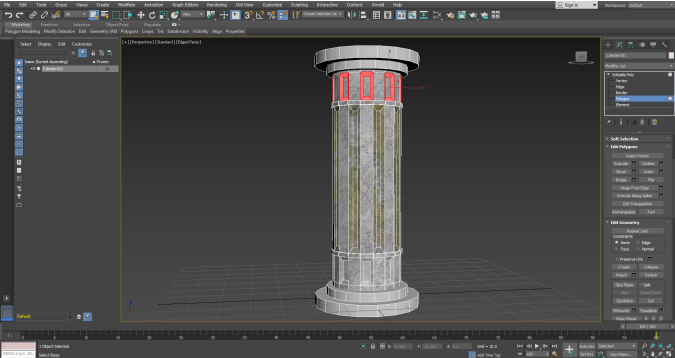
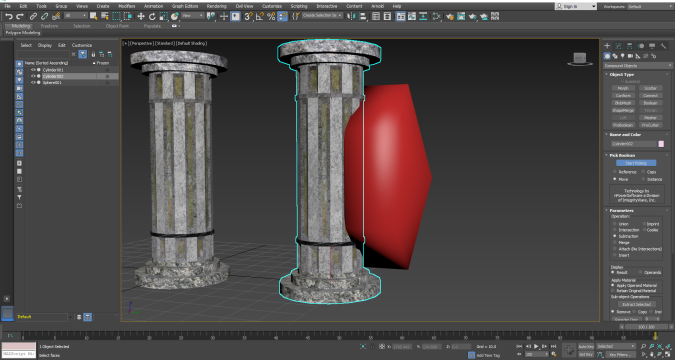
Now that the centre area of the pillar had been finished, my next priority was to texture the base areas for the pillars. I then finished off the pillar 3D model by following the same method as I did for the gravestones, tombstones and candles. I made a copy of the pillar and added a low segmented sphere. I then probooleaned the sphere on certain parts of the pillar, making it looks destroyed and wrecked.
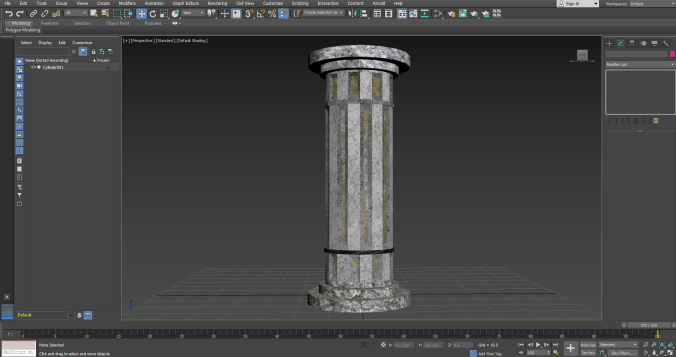
I then implemented the models into my project.
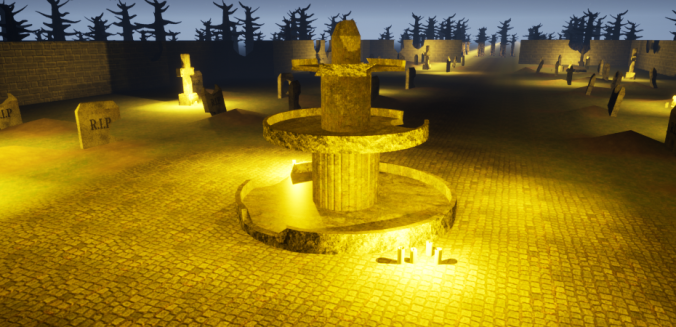
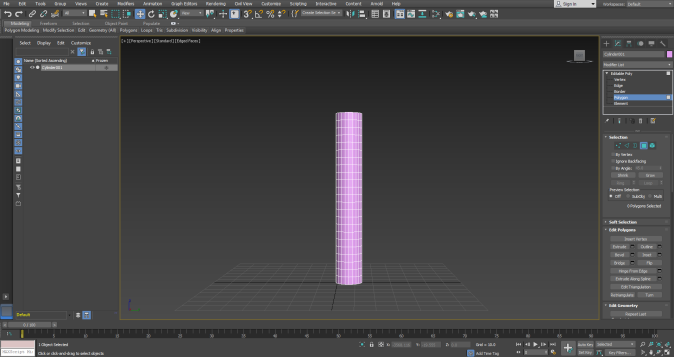
Another model I had to make for my project was the fountain for the centre of my graveyard. I was originally going to make a statue but I looked into it, and that’d take too long to create. I started my fountain model by placing a big cylinder in the centre of the 3Ds Max. I then copied and pasted the cylinder and placed made it a bit smaller and probooleaned the model on the inside of the cylinder.
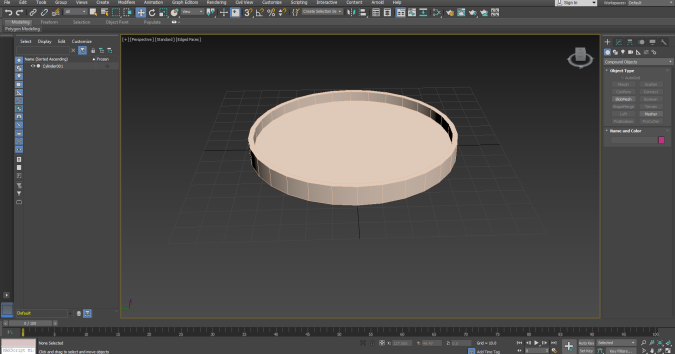
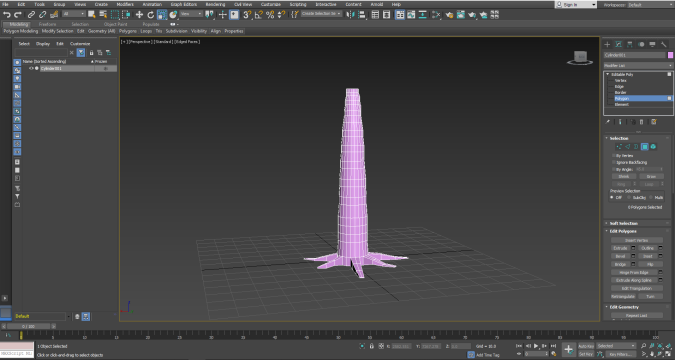
After doing this, I placed a long cylinder in the centre of the cylinder. This cylinder is supposed to be the centre area of the fountain. I then copied the cylinder made it smaller and placed it further up the fountain centre cylinder. I did this twice. I then turned the centre cylinder into an editable poly and beveled the top of it. Whilst the centre cylinder is an editable poly I selected the polygons and beveled the inside area of the cylinders.
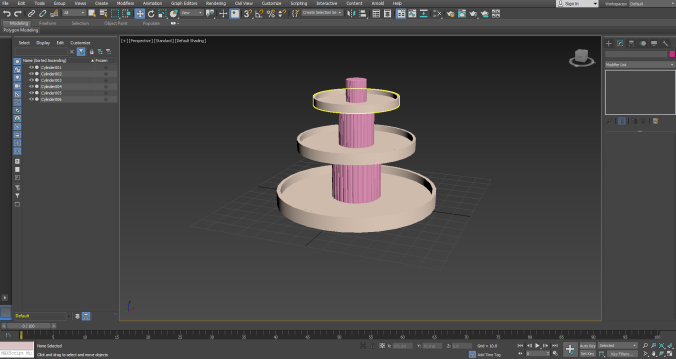
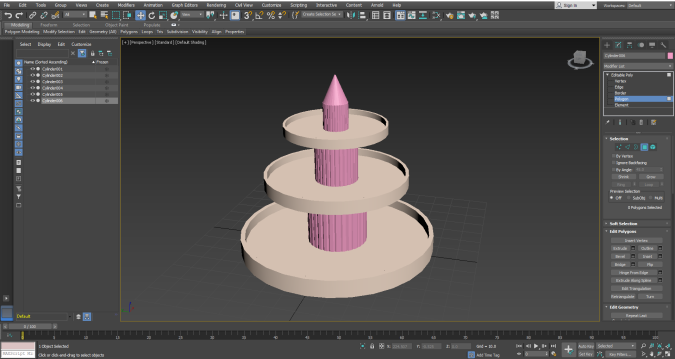
I then textured the fountain with the suitable textures. I finished off the fountain by following the same method as I did for making my other models. I added spheres with low segments and probooleaned areas of the fountain.
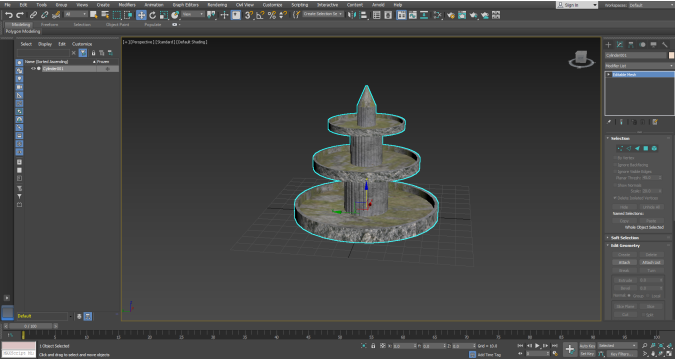


I finally implemented it into my project.
The final model I had to make for my project, the model being a tree that would give someone the illusion that there is an area beyond the graveyard. I started this tree model by adding in a thin cylinder to 3Ds Max. I added segments to the cylinder and turned it into an editable poly. I then beveled out the branches for the tree model. Once I had beveled out every single branch I turbo smoothed the tree.

After making the model I textured it.

I finally implemented the model into my unreal project. I used the same model by resized it and rotated it to make it look different.